How to Upload Images to Cricut Design
I am a big fan of my Cricut machines and employ them all the time. One of the things I love is I can add my own designs to print, or cut and print. Or alternatively, I can buy SGV'due south and add together them easily too. You can even add your kid's artwork to design space and print and cutting that. I know – super clever. But How do you lot add images and files to Cricut Design Infinite? Well, I have you covered with a unproblematic how-to:
Follow our step past step detailed tutorial on how to upload your ain images to Cricut Design Space. Nosotros talk you through file types and how to tell if you can utilize them.
What Images Tin can I Upload To Cricut Design Space?
The main result when uploading images to design space is making sure that they are copyright free or that the licence is suitable for what you demand. Artistic Commons has a bully explanation on their licenses and it is fundamental to make sure that you have a commercial licence if you are planning to sell any items that you use the image on.
Cricut has its own Angel Policy which clearly states its usage policy and allows for certain commercial usage. Other companies such as Disney only allow for personal use. Then fifty-fifty though yous can upload anything to Design Space information technology is your responsibleness to make sure it isn't copywritten.
What Files Types Can I Add To Cricut Design Infinite
- PNG or portable network graphic is an image blazon that's commonly used in spider web design to provide transparent background files frequently screenshots relieve as PNG.
- JPEG Files is an prototype type often compressed and designed for photographs and uses a 24 color pallet – this can crusade images when you want to enlarge the epitome as it may become fuzzy.
- SVG is a Scalable Vector Graphic ways you tin can scale up to any resolution making them perfect for resizing and making larger as they are clear as you do not lose definition.
- BMP – Which is a file type used by Microsoft Paintshop Pro.
- DXF – this is an AutoDesk file type associated with AutoCAD or Coral Depict
How to Add Images to Cricut Design Space
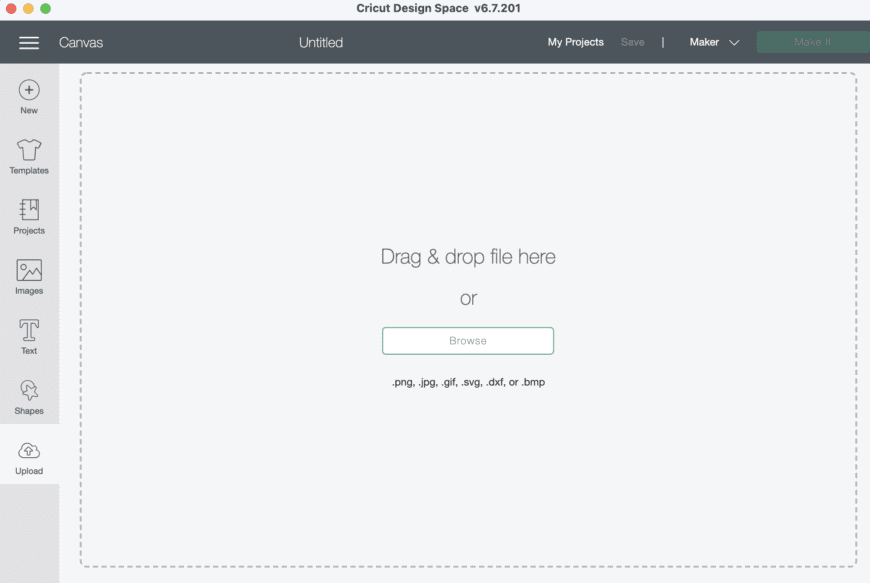
Click upload at the lesser of the left hand bar and so click upload images.
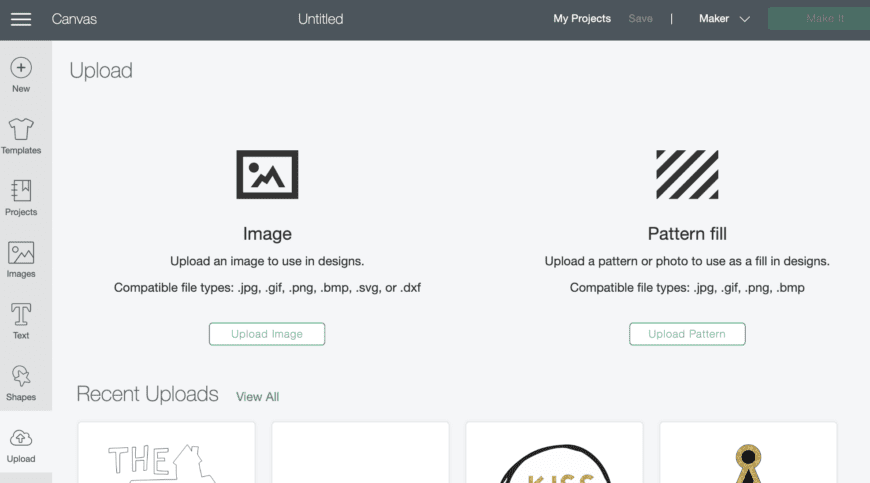
Y'all can either drag and drop the prototype or browse your folders for it
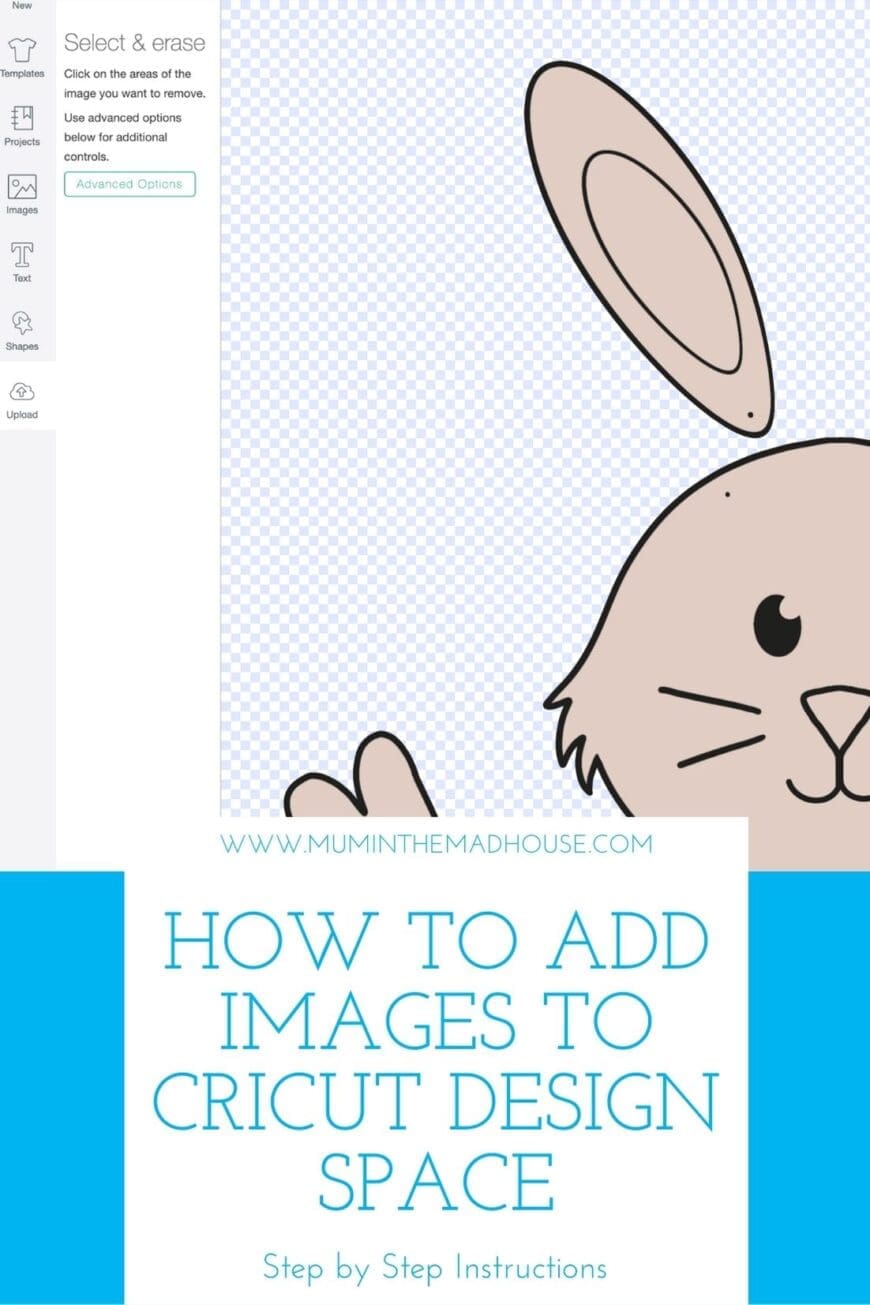
One time uploaded you take the option to select and erase parts of your paradigm by clicking the star on areas to be removed.
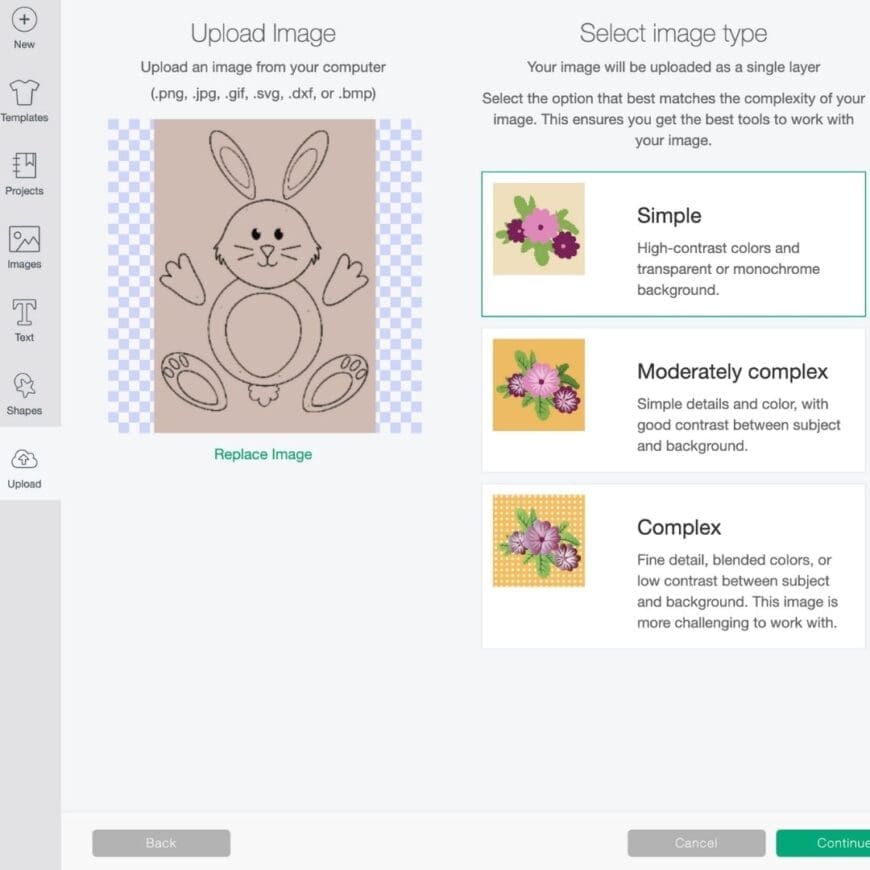
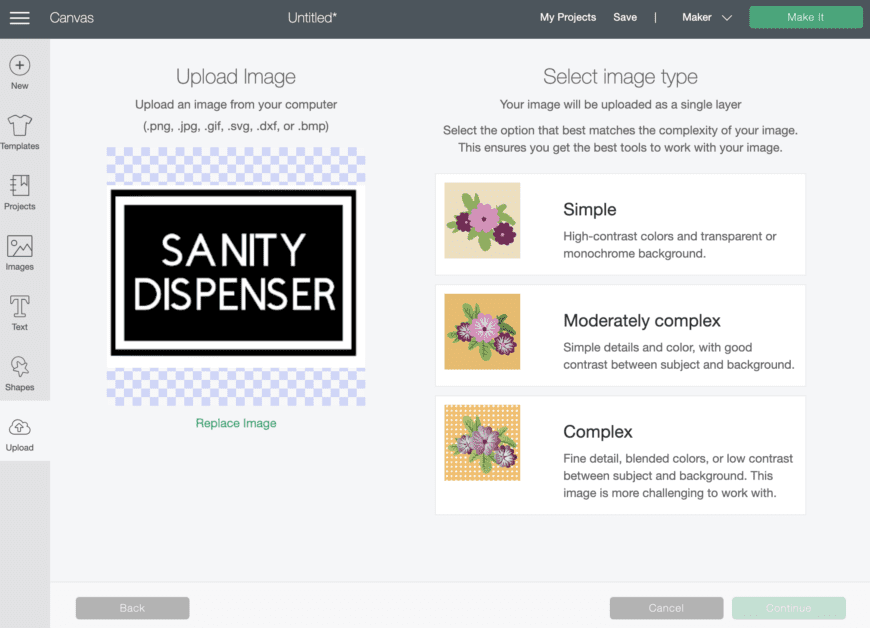
One time you cull a basic image to upload, it volition show a preview on the left side and ask you to select the epitome type. You can choose from:
- Simple: a super basic epitome with loftier-contrast colors and either a transparent or single-colour background
- Moderately Complex: an paradigm with some details and multiple colors, but there is nevertheless good contrast between the bailiwick of the epitome and the background
- Complex: a detailed image with blended colors or shading/gradient (these images are a little harder to work with because of the level of item)
For this example I chose "Simple" because it's a very simple 2 colour design. And so click the green "Continue" button.
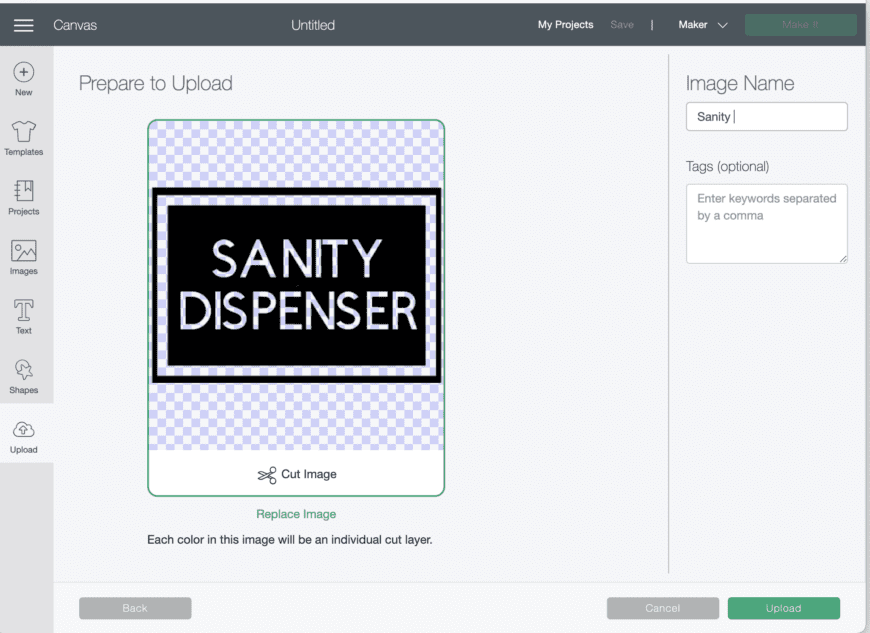
The next step is to "procedure" the image to make sure just the parts yous actually want cut out get in into your project. Yous have three bones tools you can use to process the paradigm:
- Select & Erase:This is similar the magic wand tool in PhotoShop; information technology allows yous to select an area or specific colour in your uploaded image and erase it. If you click the "Avant-garde Options" button you can modify the tolerance.
- Erase: This is just a standard eraser tool. You tin can change the size of your eraser using the slider on the left.
- Crop:You tin crop away entire areas of your prototype using the Crop tool.
Make sure y'all give your epitome a name and likewise add tags and so you can search for it in your image library.
Your uploaded prototype volition appear in the Recently Uploaded Images section at the bottom of the Upload tab. Just select your uploaded image and click the green "Insert Images" button to add information technology to your projection!
Bank check out our other Cricut posts here
Source: https://www.muminthemadhouse.com/how-to-add-images-and-svg-files-to-cricut-design-space/
0 Response to "How to Upload Images to Cricut Design"
Post a Comment